Category Archives: Drawing

Interior Space Study

Learning Objectives

Project Description

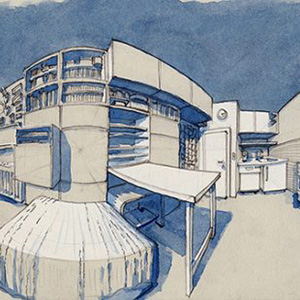
Create a drawing of hallway or interior space that

  • Is accurately measured (proportion and scale),
  • Utilizes correct linear perspective (vanishing point(s))
  • Establishes a deep sense of space (foreground, middle ground & background)
  • Includes descriptive details and characteristics of the space (doorways, windows, furniture, etc…)

Project Considerations

  • Remember that the tops and bottom lines on any architectural details along the receding walls will recede back toward the vanishing point. (doors, baseboards, windows, recessed hallways, signs, etc)
  • To prevent smudging while you work, keep clean sheet of paper under your hand while you are drawing, especially while you are using the softer pencils.

Materials

18”x24” drawing paper, graphite pencils (HB-2B), erasers, rulers, drawing boards, sighting sticks

Directions

  1. Find a suitable space to work. A hallway or large room where you have enough distance to measure from floor to ceiling with your sighting stick will work well. Be sure to sit on a chair so that your eye level is not too low to the floor.
  2. Use a sharpened H or HB pencil to lightly begin your drawing. Follow the measuring directions on the next few pages to set up your space, starting with identifying and measuring the basic proportions of the room/hallway and then identifying the vanishing point from your fixed position. Feel free to walk across the room/hallway and mark the vanishing point on the wall with some tape!
  3. Once your drawing is accurately mapped out begin adding in description and details that define the interior space. (Doorways, large furniture, windows, etc…) These details will help establish the foreground, middle ground and background.
  4. Add expression to your drawing with varying line weight to emphasize overlapping forms and the illusion of distance. (Lighter line weight with forms farther away)

Setting up your drawing…

Step 1: Locate and measure the front of the space. Use this frame as a unit of measure.

Step 2: Locate your fixed position (eye level & vanishing point)

Step 3: Locate vertical lines of the far end of the hallway walls

Step 4: Locate the top & bottom corners of the front and back end of the hallway walls.

Steps 5+: Add hallway details and value.

Ink Contours

Learning Objectives

  1. Students will demonstrate appropriate techniques for using India ink on watercolor paper through the progressive building of layers.
  2. Students will be able to accurately illustrate value changes and depth through the use of India ink.

Info

With your previously completed contour drawing created on watercolor paper, use India ink to create an engaging and contrasting value study painting. Using a cup of water, thin the India Ink until you have a very light grey. You can use this light grey to build up subtle value changes throughout your drawing.

If you make the ink too dark and apply it to the paper, there is no way to lighten it up. Take your time and allow the ink to dry between layers. When your India ink drawing is dry, hang it up on the board. Does the drawing grab your attention and make you want to come in for a closer look? Once you do come in for a closer look, are there enough details to keep you interested or were you able to see everything from afar?


Materials

  • Sketchbook
  • Contour drawing completed on watercolor paper
  • Small paint brush
  • India Ink
  • Cup
  • Water

Sketchbook Mini-Assignments

1. Using a houseplant or bush from outside, draw the negative space surrounding the plant using contour drawing. Negative space is typically the space around an object. Positive space is usually the object itself. (see this link for more information). After you have drawn the negative space, fill it in with graphite or marker. Do 3 of these in your sketchbook.


Project

  1. On a small sheet of watercolor paper, create a contour drawing of your feet. Bring this to class for the Ink Demo.
  2. Using one of the compositions you created for the contours assignment, create a detailed contour drawing in Sharpie on watercolor paper. Focus on using both thick and thin lines. Thin lines will appear further back in space while thicker lines will appear closer. After you have completed the drawing, fill in the values using India ink of different shades, working from light to dark.

Research

Jim Dine
Cy Twombly

http://player.vimeo.com/video/41182478?title=0&byline=0&portrait=0&color=ff9933

Group Value Drawing

Learning Objectives

  1. The student will be able to define value and its relationship to light.
  2. The student will be able to differentiate between various tones and demonstrate that understanding through drawing.

Materials

  1. 1 sheet of 18″ by 24″ white drawing paper
  2. Several sticks of vine charcoal
  3. Kneaded eraser
  4. Chamois
  5. Paper towels
  6. Blending stumps

Sketchbook Mini-Assignment

  1. Make 1 fully shaded value drawing of a spherical objects under a direct light source.
  2. Make 1 fully shaded value drawing of a cubic shape under a direct light source.
  3. Make 1 fully shaded value drawing of trash.
  4. Create a 10 step value scale using a #2 pencil. You will have to vary the pressure to get really light and really dark shades.
  5. Create a 10 step value scale using a range of pencils from 6H to a 6B.

Do all of these drawings with a pencil in your sketchbook.


Project

  1. This assignment is done in 1 class period and is a surprise.

Gesture Drawing

Learning Objectives

1. Develop observational, compositional and conceptual problem-solving skills (supports PLO 6).
2. Demonstrate proficiency in the use of basic drawing media (supports PLO 6). 
3. Demonstrate various drawing techniques (supports PLO 6).
4. Develop critical thinking skills as they apply to the visual arts (supports PLO 4 and 6).

Materials

  • Newsprint
  • Vine Charcoal

Info

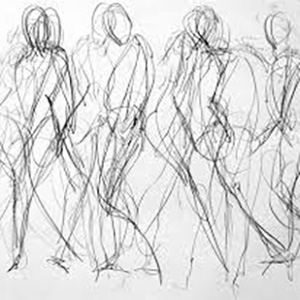
Gesture drawing explores the form and movement of an object in space, as your eye follows its shape. Often it may look quite realistic, but more often gesture drawings will have just a sense of the overall form. Gesture drawing isn’t an outline, nor is it an abstract drawing. It might not always look realistic though, because it isn’t trying to represent the figure in a photographic way, but trying to suggest the essential feeling of the subject.

Imagine you are describing the object with your hands as you talk to someone – those hand gestures are very like those you make when gesture drawing. The marks are quick and deliberate. You look at the subject and try to sum it up with a few marks, as you might describe it in a few words. Because you don’t have much time, each word – each mark – in a gesture drawing must say something significant about the subject.

When creating a gesture drawing, according to Kimon Nicolaides in ‘The Natural Way to Draw’, “you should draw, not what the thing looks like, but what it is doing. You need to ‘sense’ the thing that you are drawing. Is it fluid and soft, or spiky and hard? Is it coiled like a spring, or off-center and asymmetric, or is it solid and balanced?

By nature gesture drawing tends to be done rapidly. Loose, often circular marks capture the flow of forms. Look at the whole object and notice points of tension, direction of weight or pressure, spaces, protrusions into space.

Sketchbook

  1. 5 gestures of living objects and 5 gestures of non-living objects. These should be done with pencil in your sketchbook, drawn from life and should be done in less than a minute each.
  2. Check out one book from the library, preferably from the Art section. You can also find images online but they need to be of real things – not images of paintings or other 2 dimensional works. Flip through the book and find 20 images that are visually appealing. Draw each of these images in your sketchbook. 1 page per image (you can draw on the back and front). Do these as quickly as possible but not more than a minute each.
  3. Answer these questions in your sketchbook: Why do we begin with gestures? What is the role of empathy in drawing? What does “movement” have to do with it? In what ways does gesture inform us in our drawing?

Project

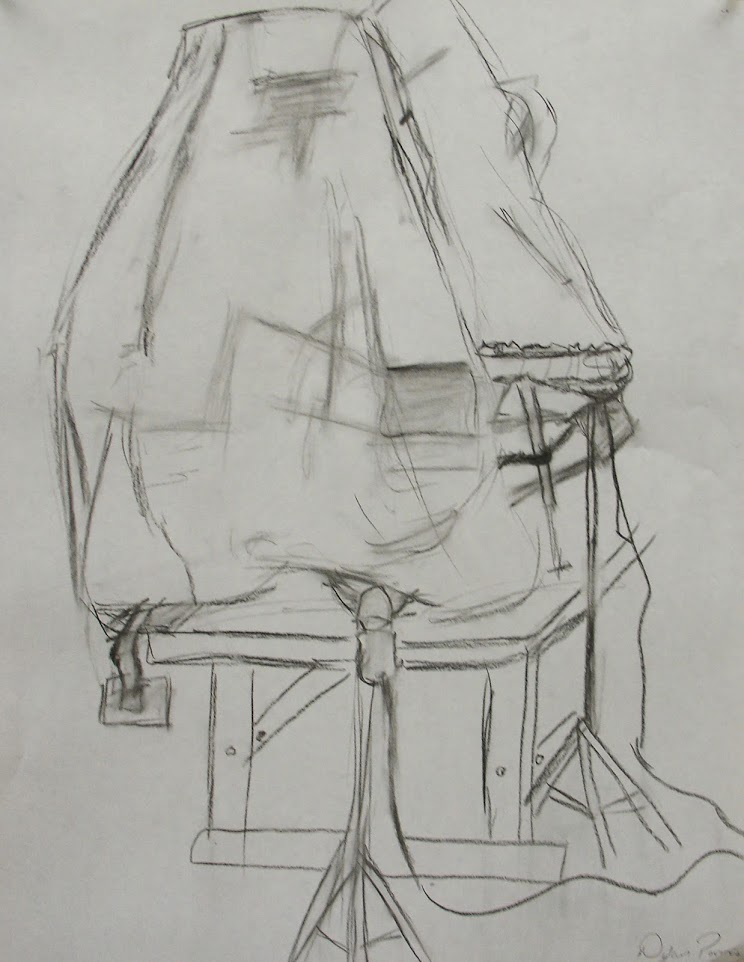
Students will set up a table with a low stool or box on top.  They will then cover this with a white fabric, black fabric, or striped fabric.  Students will be instructed on how to correctly set up a still life using a 3 stage method (ground, table, and stool).  Students need to create areas of interest on all sides. Students will also be directed to look for good compositions.

Gestures are designed to capture movement and overall form, not detail. This type of drawing should be done with the whole body, especially the arm.

Examples

1 Minute Gesture (5, drawing different objects each time)
2 Minute Gesture (15, rotate to the right for each drawing)
1 Minute to 5 Minute (3, start with only 1 minute, then allow students to add details)
5 Minute (3, change positions, low, medium, high)

Research

MichelangeloRodinAlberto GiacomettiEdward Degas

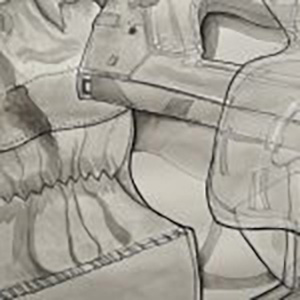
Fabric Drawing

Learning Objectives

  1. Students will be able to demonstrate an understanding of accurate drawing skills using graphite.
  2. Students will be able to demonstrate an understanding of value, movement, contrast, and form through drawing

Materials

  • Graphite
  • White paper
  • Kneaded eraser
  • White plastic eraser

Sketchbook

Steps:
1. Watch the video below
2.. Set up fabric on a flat surface. Fold the fabric and create an interesting composition with the fabric
3. Lightly sketch the fabric on the whole sheet of sketchbook paper
4. Add values to the drawing that represent a broad range. Refer to your value scale that you created. 
5. Use an eraser to grab light values
6. Edit and correct your drawing


Project

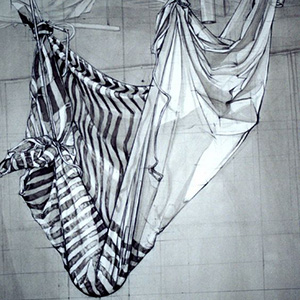
Create a detailed, full value, proportional drawing of hanging cloth on white paper with graphite, capturing the direction of the light source and emphasizing three dimensional form.

Part 1 – In your sketchbook, create a least 5 gestural studies to work out composition. Remember to keep the focal point out of the center and use the folds and value contrasts in the fabric to draw the viewer’s eye around the composition.

Part 2 – Using your most successful composition, gesture out that composition on the large 18″ by 24″ sheet of white paper. Use graphite to complete your drawing, paying close attention to lights and darks. Make sure to step back from your drawing to make decisions about contrast and value. Think about the background and how you could use a darker value to help bring the fabric to the foreground.


Research

Exploring Process, Composition & Abstraction

LEARNING OBJECTIVES

Students will show proficiency with graphite as a medium.
Students will explore abstraction using previously created imagery.
Students will demonstrate competency with compositional arrangement.

MATERIALS

1 Old drawing from your portfolio, Vine Charcoal, Compressed charcoal, 1 sheet of drawing paper, chamois, scissors, erasers, etc…

INSTRUCTIONS

  1. IN CLASS:  Begin by cutting or tearing your drawing into 4-6 sections of various shapes and sizes.
  1. IN CLASS:  Exchange 1 piece of your drawing with the person on your left.  Exchange another piece of your drawing with the person on your right.
  1. Spend time arranging and rearranging the cut/torn sections into a new composition that is approximately the same size as your original drawings.  Experiment with overlapping, cutting the sections into smaller sizes, etc…Record your variety of arrangements in a series of 5-10 small sketches on newsprint paper.
  1. Once you have reached an interesting composition tape the torn elements together and begin transferring (re-drawing) your composition lightly onto a new sheet of drawing paper. 
  1. From this new sketch develop a finished drawing that incorporates a dynamic use of line weight, eraser marks and use of value through the use of your compressed charcoal. 

Exploring Open & Closed Form in Composition

Materials

Potted Plant, 3 simple geometric shaped objects (cylindrical & box), Viewfinder, sighting stick, vine charcoal, charcoal pencils, erasers, (2) sheets of18”x24” drawing paper


Assignment objectives & description

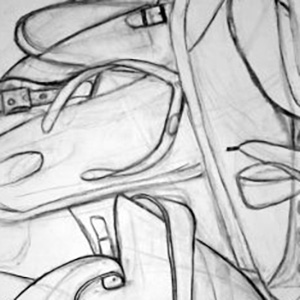
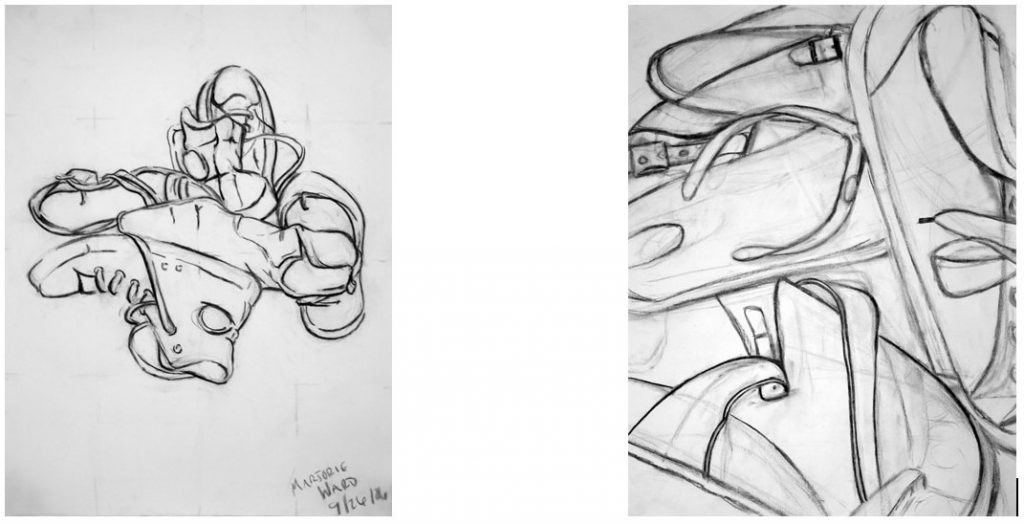
For this assignment you will create 2 contour line drawings in charcoal (1 open form & 1 closed form composition).  Your subject matter will be your plant and a small arrangement of 3 geometric objects (3 is minimum). 

Each drawing should illustrate a sensitive use of line weight to enhance the illusion of depth (i.e. forms closer to you will use progressively heavier/darker lines and forms farther away will use progressively lighter lines).   DO NOT INCORPORATE ANY SHADING!

In the open form composition, the edges of your plant and geometric objects will be severely cropped off all 4 sides of your page. Use the viewfinder to look for interesting compositional elements and passageways through in this cropped view. 

In contrast, your closed form composition should utilize a comfortable amount of space around the entire grouping of your plant & geometric object forms. 


Example of a similar project using shoes:

Student Drawing                                               Student Drawing
(Closed Form)                                                    (Open Form)

Explore

Learning Objectives

1. Students will demonstrate the ability to use research to help explore creative concepts.
2. Students will be able to expand their creative development.


Materials

Use any medium or combination of media: collage, charcoal, pencils, conte, pen and ink, wash, ballpoint, colored pencils, chalk pastels, oil sticks…


Sketchbook Mini-Assignments

1. Work and research. Include your research in your sketchbook.
2. Read Top artists reveal how to find creative inspiration (theguardian).


Project

Explore a theme in 20 drawings through 1’x1’ drawings of a theme of your choice, done from observation. Explore expression, composition, space, tone, line, texture, shapes, light, color, surface, media, distortion, marks, gestures, approaches, styles, moods, techniques, strategies, processes, concepts, etc.

This series is designed to address the importance of drawing as a record of seeing, understanding, and responding to one’s experience of looking. The commitment to visual literacy is manifest in the innovation and exploration of a variety of media and mark-making and their structural and expressive roles. What interests you? What boils in your belly? What gives you a thrill and brings meaning to your work? What are your obsessions? As you explore a wide range of issues and concepts in your critical thinking, art theory, and studio classes what do you find out about yourself? What insights have you gained about your role as an artist in the greater social and cultural context?


Research

War: Fransisco de Goya, Otto Dix, Kathe Kollwitz, George Grosz, Jacques Louis David

Self-portrait: Egon Schiele, Frida Kahlo, Max Beckmann, Philip Akkerman, Suzanna Coffey

Bathers: Pierre Bonnard, Paul Cezanne, Edgar Degas, Pierre-Auguste Renoir, Graham Nickson

The Nude: Lucian Freud, Jenny Saville, Paula Rego, Euan Uglow, Modigliani, Alan Feltus, John Currin, Eric Fishl, Philip Pearlstein

Still life: Georgio Morandi, William Bailey, Janet Fish, Jim Dine, Claudio Bravo

Narrative: Balthus, Munch, Ensor, Jerome Witkin, Leon Golub, Jack Malczewski, Stanley Spencer

Landscape: Rackstraw Downes, Wayne Thibeau, George Nick, John Moore

Check the work of Barry Nemett.

Epic Still Life

Learning Objectives

Students will be able to demonstrate drawing skills acquired in the previous Drawing 1 course. Students will demonstrate their ability to accurately render objects from life, focusing on scale, proportion, value and line. Students will be able to accurately render the objects before them from the correct angle.

Materials

18 x 24 inches white paper
Charcoal, Conte or Graphite
Eraser
Drawing Board
Clips
Viewfinder

Homework

See Calendar

Process

Students should place their easels around the still life so that every angle is covered. Using a white sheet of paper and the drawing media of your choice (charcoal, conte or graphite) recreate what you see. Pay close attention to the relationship of objects to each other. Check proportion and scale for accuracy. Pay close attention to shading and contrast. Back up if you need to to better see what you are drawing.

This drawing should be rendered as much as possible within the given amount of time. Start with your gesture first to work out proportions. Follow with adjustments, shading and details.

The drawings will be displayed as a group sculpture, recreating the still life in 3 dimensions.

Drawing with the Senses

Learning Objectives

  • Students will be able to demonstrate an awareness of their other senses, in particular the sense of touch, through exploring the variety of pressures applied to drawing tools, and the emphasized awareness of arm, hand and finger movements while drawing.
  • Students will be able to become aware of one’s own body in relation to drawing.
  • Students will be able to become sensitized to the physicality of drawing mediums and to the physical variations of the layers in a drawing.
  • Students should be open to allowing chance to take place and letting unexpected accidents to happen.
  • Students will demonstrate an understanding of the possibility for intuition and instincts to play a greater role in the drawing process.

Project Description

Materials

  • Some sort of blindfold
  • 2 sheets of white or off-white paper, 18 x 24 inches minimum in size
  • 3-4 sheets of heavy duty paper or cardboard
  • Chalk or oil pastels (preferably oil pastel – if using oil pastel you will need something to scrape and scratch the oil pastel away)
  • Charcoal
  • Rubber Eraser for subtracting chalk pastel, charcoal, chalk line dust, or graphite powder.
  • Pencils, markers, and colored pencils
  • At least 15 Stencils and Templates
  • (Optional) Chalk line dust or graphite powder – if you use either of these mediums bring a dust mask.

Directions

Read through the assignment before class and answer these questions in your sketchbook.

  • How do our senses help define the world we live in?
  • How might one of our senses allow us to know something about a place, object, etc more or less than another of our senses?
  • Watch the video below on Chance and Randomness and take notes in your sketchbook. What was Dada?
  • Read Robert Morris’s Blind Time Drawings (Began series in the 1970’s) and bring a printed copy to class. You may also want to look over some of the work here.

You will be creating two drawings. The first drawing will be done with your stencils but blindfolded. The second drawing will also be done with the stencils but you will not be blindfolded. Focus on the way the shapes and stencils feel in your hand. Notice the differences between the sighted drawing and the blind drawing. The blind drawings are usually much more energetic, partly because you don’t know for certain what you are doing but also because you are making aesthetic judgments on your drawings. You are allowing yourself to just draw.

Using heavy-duty paper, create an assortment of stencils and templates of various sizes and shapes. Some of the stencils/templates should be considerably larger than your hand while others may be same size or smaller than your hand.

To make stencils: cut out (or tear) shapes in materials such as paper and or cardboard (the shaped hole in the material is the stencil, the shape removed from the material to create the shaped hole is the template). Geometric shapes may include squares, rectangles, circles and triangles and a combination of those shapes. Organic shapes may include blob shapes and/or bean shapes and/or asymmetrical clover shapes. Or you may find some ready made stencils or templates that are abstract. The more ambiguous and abstract the stencil the more successful your drawing will be in reaching the assignment objectives.

As you draw blind folded you will feel each cut out stencil and template to trace and layer shapes in your drawing using an additive and subtractive process. You may place a stencil down and fill it in, place a different stencil on top and erase it out. Don’t be afraid to go all the way to the edge of your sheet of paper as you work. No peeking through your blindfold!

Research / Examples